
Getting Started
Scroll
Mask Section Transition
New
Background Image Parallax
New
Text Parallax
New
Sticky Footer
Perspective Section Transition
Text Along Path
SVG Path On Scroll
Horizontal Section
Zoom Parallax
Parallax Scroll
Horizontal Scroll
Text Gradient Scroll Opacity v2
Cards Parallax
3D perspective Scroll
SVG Mask Scroll
Smooth Parallax Scroll
Smooth Scroll
Mouse
3D
Archive
Pixel Transition
SVG Morph
Sliding Stairs Menu
Floating Image Gallery
Project Gallery Mouse Hover
Text Gradient Opacity On Scroll
Svg Curve Loading
Text Clip Mask On Scroll
Image slide project gallery
Mouse Image Gallery
Pixel Cursor Trailing
Text Mask Animation
3D Perspective Text
Project Gallery Colored Card
Cartoon Cursor Trailing

Olivier Larose
August 28, 2023
/
Medium
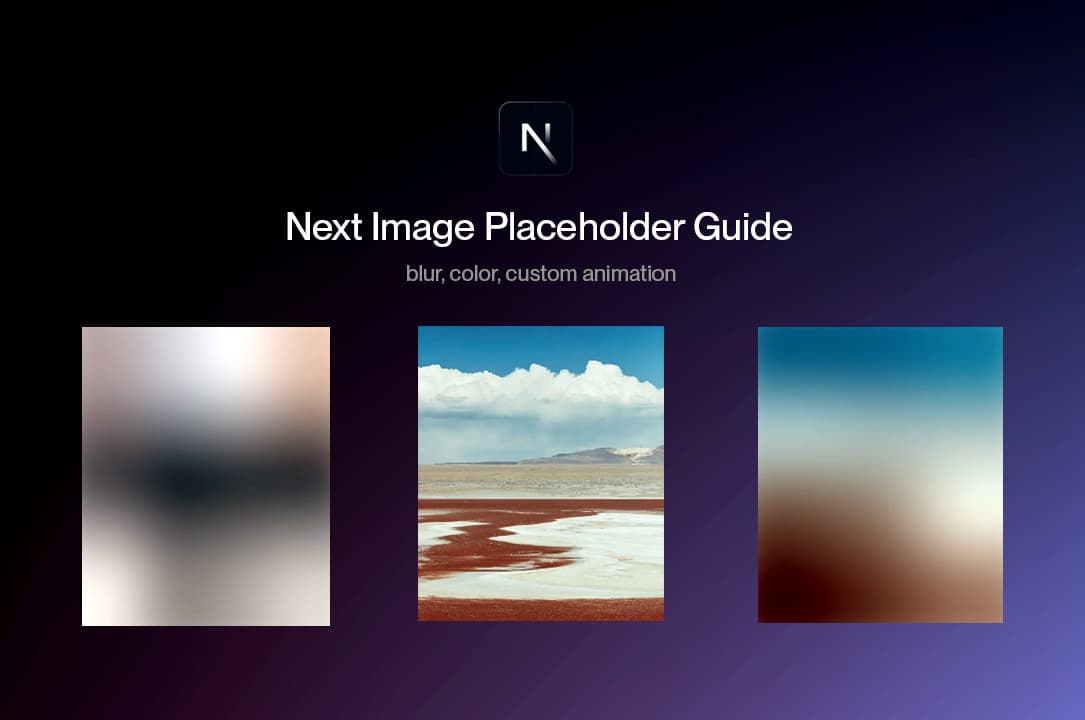
Placeholder Guide using Next Image
Complete Guide on Placeholder using Nextjs Image, Plaiceholder, Blur, Color
A complete guide on how to use different kind of placeholders like colors and blur using the Plaiceholder Library and the Next Image.
Why use the Next/Image
Note: This tutorial uses the App Router.
When I started using Next.js I had such a hard time using the Next Image, it was frustrating. But with time I understood the power of it and how useful it actually is.
One of its main strength is the Visual stability, and that’s why it’s hard to use at first, it’s because it solves a huge problem: the layout shifts.
But solving the layout shifts problem brings another problem which is filling the space that is created to avoid those shifts. That's where the importance of placeholders comes in.
What is a Placeholder
When we talk about placeholders, it means that while the image is loading, we render something in front of it in order to show the user something (not leave the hanging in blank space).
My two favorite options are to either to render a simple html div with a background color, or to render a lower sized, blurred version of the image.
For the blur to work, we need to process the image server-side so that when the client sees the website, we readily have a lower res blurred version of the image to render.
- We'll use the Plaiceholder library to create dynamic placeholders, so we can run
npm i plaiceholder
I'll take a look at 7 different placeholders:
- Static Default Blur: The default blur provided by Next.js, requires a static import to work
- Static Plaiceholder's Blur: A blur created with the Plaiceholder's library when using static images
- Static Plaiceholder's Color: A color created with the Plaiceholder's library when using dynamic images
- Dynamic Plaiceholder's Blur: A blur created with the Plaiceholder's library when using dynamic images
- Dynamic Plaiceholder's Color: A color created with the Plaiceholder's library when using dynamic images
- Custom Opacity Animation: A custom implementation that presents a background color that fades when the image loads
- Custom Slide Animation: A custom implementation that presents a background color that slides when the image loads.
Default Blur Placeholder
Next js offers a default blur placeholder, by far the easiest implementation.
For it to work, the Next Image simply requires this:
- The image needs to be statically imported.
- Have the property
placeholder:"blur"
static/defaultBlur.jsx
1
import Image from 'next/image';2
import styles from '../style.module.scss';3
4
export default function defaultBlur({src}) {5
return (6
<div className={styles.container}>7
<p>Blur</p>8
<div className={styles.imageContainer}>9
<Image10
src={src}11
fill12
alt="image"13
placeholder='blur'14
/>15
</div>16
</div>17
)18
}
We should have something like this:
Plaiceholder Static Blur
One thing I don't like about the default placeholder blur offered by Next.js is that it requires a static import.
One way of bypassing that is to pre-render a blur using the plaiceholder library.
static/plaiceholder/blur.jsx
1
import Image from 'next/image';2
import styles from '../../style.module.scss';3
import fs from "node:fs/promises";4
import { getPlaiceholder } from "plaiceholder";5
6
export default async function blur() {7
8
const src = '/images/picture.jpg';9
const buffer = await fs.readFile(`./public${src}`);10
const { base64 } = await getPlaiceholder(buffer);11
12
return (13
<div className={styles.container}>14
<p>Static Plaiceholder blur</p>15
<div className={styles.imageContainer}>16
<Image17
src={src.replace('./public', '')}18
fill19
alt="image"20
placeholder='blur'21
blurDataURL={base64}22
/>23
</div>24
</div>25
)26
}
Couple notes about the code:
- Here we extract the data (buffer) of the image server-side and create a base64 blurred version of the image that we then use as a
blurDataURL.
Plaiceholder Static Color
Here we can use the same concept as the blur with the plaiceholder library, but instead extract the most prevalent color.
static/plaiceholder/color.jsx
1
import Image from 'next/image';2
import styles from '../../style.module.scss';3
import fs from "node:fs/promises";4
import { getPlaiceholder } from "plaiceholder";5
6
export default async function color() {7
8
const src = "/images/picture.jpg"9
const buffer = await fs.readFile(`./public${src}`);10
const { color } = await getPlaiceholder(buffer);11
12
return (13
<div className={styles.container}>14
<p>Static Plaiceholder color</p>15
<div style={{backgroundColor: color.hex}} className={styles.imageContainer}>16
<Image17
src={src.replace('./public', '')}18
fill19
alt="image"20
/>21
</div>22
</div>23
)24
}
Plaiceholder Dynamic Blur
The problem with static images is that well most of the time, our images are coming from a server. We basically don't have them storred inside our public folder.
But this is not a worry, we can use plaiceholder to fix that problem and pre-render a blurred version of the image on the server.
However, for this to work, we need to modify our Next.js config file.
next.config.mjs
1
/** @type {import('next').NextConfig} */2
import withPlaiceholder from "@plaiceholder/next";3
4
const nextConfig = {5
images: {6
domains: ["images.unsplash.com"],7
},8
}9
10
export default withPlaiceholder(nextConfig);
Couple notes about the above code:
- We export the next config with the plaiceholder function.
- We specify a domain to use dynamic images.
- The config file is changed to a .mjs file.
dynamic/blur.jsx
1
import Image from 'next/image';2
import styles from '../style.module.scss';3
import { getPlaiceholder } from "plaiceholder";4
5
export default async function blur() {6
7
const src = "https://images.unsplash.com/photo-1621961458348-f013d219b50c?auto=format&fit=crop&w=1000&q=80";8
const buffer = await fetch(src).then( async (res) => {9
return Buffer.from(await res.arrayBuffer());10
})11
12
const { base64 } = await getPlaiceholder(buffer);13
14
return (15
<div className={styles.container}>16
<p>Dynamic Plaiceholder Blur</p>17
<div className={styles.imageContainer}>18
<Image19
src={src}20
fill21
alt="image"22
placeholder='blur'23
blurDataURL={base64}24
/>25
</div>26
</div>27
)28
}
Plaiceholder Dynamic Color
Very similar to the dynamic version, we can simply extract the color instead.
dynamic/color.jsx
1
import Image from 'next/image';2
import styles from '../style.module.scss';3
import { getPlaiceholder } from "plaiceholder";4
5
export default async function blur() {6
7
const src = "https://images.unsplash.com/photo-1621961458348-f013d219b50c?auto=format&fit=crop&w=1000&q=80"8
const buffer = await fetch(src).then( async (res) => {9
return Buffer.from(await res.arrayBuffer());10
})11
12
const { color } = await getPlaiceholder(buffer);13
14
return (15
<div className={styles.container}>16
<p>Color</p>17
<div style={{backgroundColor: color.hex}} className={styles.imageContainer}>18
<Image19
src={src}20
fill21
alt="image"22
/>23
</div>24
</div>25
)26
}
Custom Opacity Animation
Here we can hard code a color for the sake of this example, but you could also extract a color using the plaiceholder library.
I use the React Intersection Observer to detect when the image comes inside of the view. So when it is loaded AND inside the view, the animation will be triggered.
custom/opacity.jsx
1
'use client';2
import Image from 'next/image';3
import styles from '../style.module.scss';4
import { useInView } from 'react-intersection-observer';5
6
export default function blur() {7
8
const { ref, inView } = useInView({9
triggerOnce: true,10
threshold: 0.511
})12
13
const src = "https://images.unsplash.com/photo-1621961458348-f013d219b50c?auto=format&fit=crop&w=1000&q=80"14
15
return (16
<div className={styles.container}>17
<p>Custom Opacity Animation</p>18
<div style={{backgroundColor: "#e9c6b0"}} className={styles.imageContainer} >19
<Image20
ref={ref}21
src={src}22
fill23
alt="image"24
sizes='300px'25
style={{26
opacity: inView ? 1 : 0,27
transition: "opacity 0.2s cubic-bezier(0.3, 0.2, 0.2, 0.8)"28
}}29
/>30
</div>31
</div>32
)33
}
Custom Slide Animation
Very similar to the custom Opacity Animation, but this time we have a an extra div with a slide animation.
custom/slide.jsx
1
'use client';2
import Image from 'next/image';3
import styles from '../style.module.scss';4
import { useInView } from 'react-intersection-observer';5
6
export default function blur() {7
8
const { ref, inView } = useInView({9
triggerOnce: true,10
threshold: 0.511
})12
13
const src = "https://images.unsplash.com/photo-1621961458348-f013d219b50c?auto=format&fit=crop&w=1000&q=80"14
15
return (16
<div className={styles.container}>17
<p>Custom Slide Animation</p>18
<div style={{overflow: "hidden"}} className={styles.imageContainer} >19
<Image20
ref={ref}21
src={src}22
fill23
alt="image"24
sizes='300px'25
style={{26
opacity: inView ? 1 : 0,27
}}28
/>29
<div30
className={styles.slider}31
style={{32
left: inView ? "100%" : "0%",33
top: 0,34
width: "100%",35
height: "100%",36
position: "relative",37
zIndex: 1,38
backgroundColor: "#e9c6b0",39
transition: "left 0.2s cubic-bezier(0.3, 0.2, 0.2, 0.8)"40
}}>41
</div>42
</div>43
</div>44
)45
}
Wrapping up
We're offically done with this guide!
Super interesting to see how to leverage the Next Image Placeholder capabilities. Quite hard to understand the Next Image at first, but definitely worth the pain as it's extremely powerful. Hope you learned something :)
-Oli