Mouse Image Distortion
A website animation featuring an image distortion in a curved, using the sin function, React, React Three Fiber and Framer Motion

Olivier Larose
May 7, 2023
/
Beginner
/
Medium
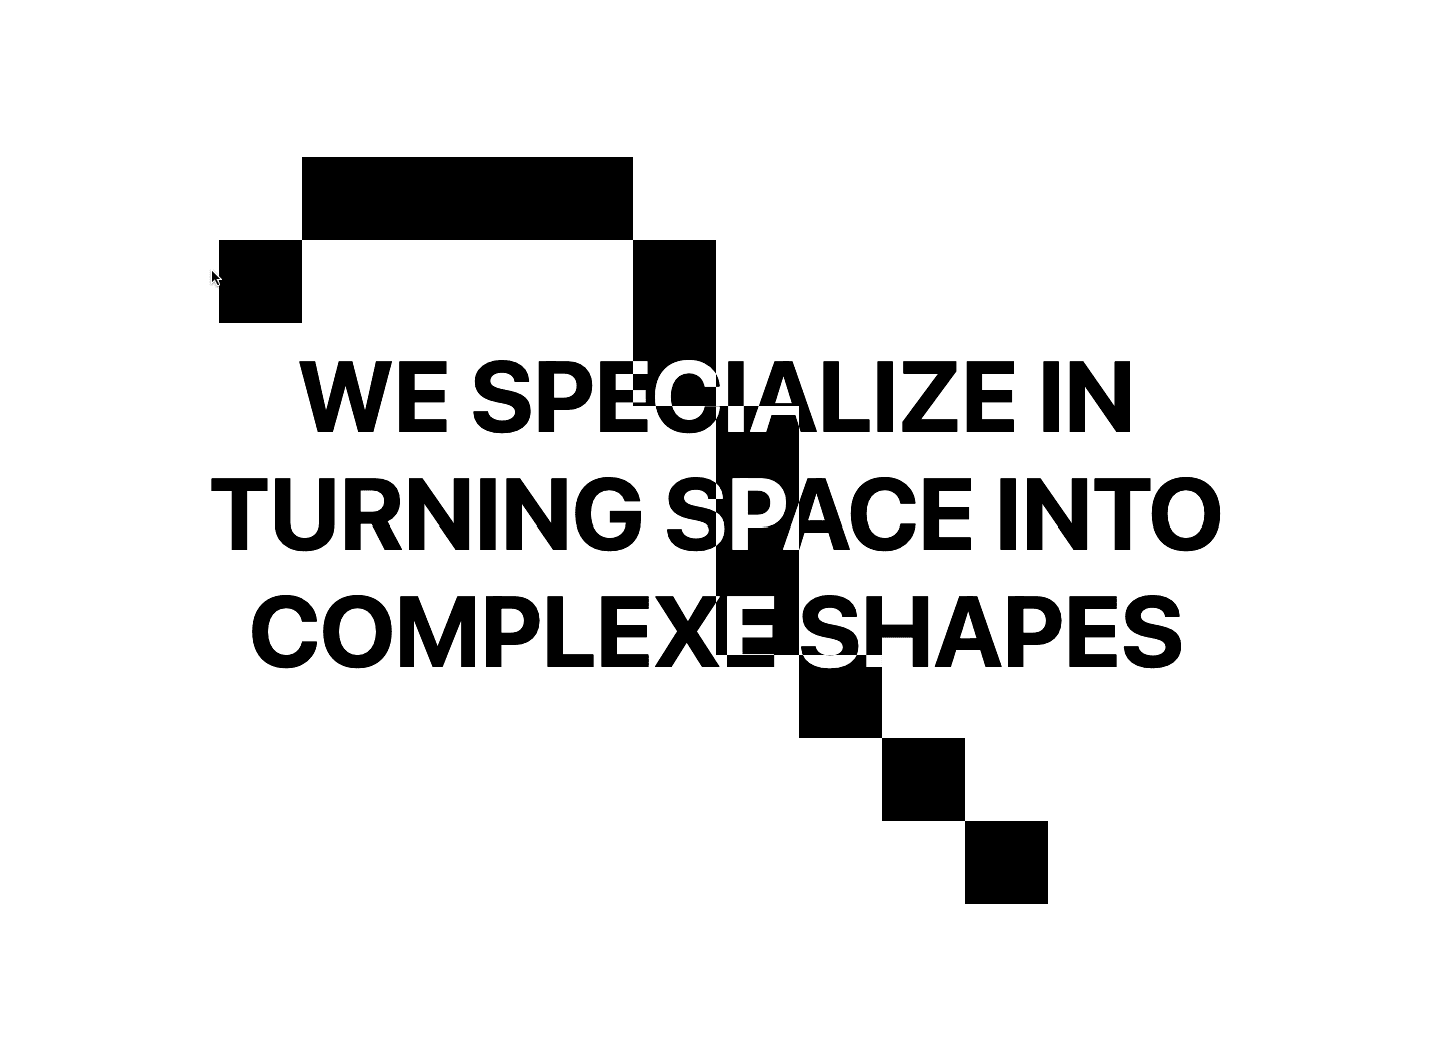
A pixel trailing effect created with React. As the cursor moves, squares are created along the mouse to create an effect of trailing. Made with React and Next.js
Live DemoSource codeVideo Tutorial
Let's start the project by creating a Next.js application. We can do that by running npx create-next-app@latest client inside of a terminal.
We can delete everything in the page.js , global.css and page.module.css and add our own HTML and CSS, to start with a nice blank application.
For the CSS, we're going to use CSS Module, so make sure to create a Home.module.css file inside of the styles folder. Thankfully, Next.js has built-in support for CSS Modules
page.js
page.mod...
1
'use client'2
import styles from './page.module.css'3
4
export default function Home() {5
6
return (7
<div className={styles.container}>8
<div className={styles.body}>9
<p>We specialize in turning space into complexe shapes</p>10
</div>11
</div>12
)13
}14
15
Now that we've added the basic layout, we'll create a series of blocks in HTML that will allow us to create the trailing effect.
5vw x 5vw of height.Math.ceil(window.innerHeight / 5vw)Since the creating of the blocks require the value of the windows width, we will initially store it inside the state.
page.js
1
'use client'2
import styles from './page.module.css'3
import { useState, useEffect } from 'react';4
5
export default function Home() {6
7
const [windowsWidth, setWindowsWidth] = useState(0);8
9
useEffect(() => {10
setWindowsWidth(window.innerWidth);11
}, [])12
13
return (14
<div className={styles.container}>15
<div className={styles.body}>16
<p>We specialize in turning space into complexe shapes</p>17
</div>18
</div>19
)20
}21
Once we have stored the windows width inside the state, we can now use it to render the blocks.
page.js
Home.mod...
1
...2
const [windowsWidth, setWindowsWidth] = useState(0);3
4
const getBlocks = () => {5
const blockSize = windowsWidth * 0.05;6
const nbOfBlocks = Math.ceil(window.innerHeight / blockSize);7
return [...Array(nbOfBlocks).keys()].map((_, index) => {8
return <div key={index}></div>9
})10
}11
return (12
<div className={styles.container}>13
...14
<div className={styles.grid}>15
{16
windowsWidth > 0 && [...Array(20).keys()].map( (_, index) => {17
return <div key={'b_' + index} className={styles.column}>18
{19
getBlocks()20
}21
</div>22
})23
}24
</div>25
</div>26
)27
Here's a couple of important things to note:
nbOfBlocks depending on the windows height and the windows width.Now that we have all the blocks, we can simply add a mouse event listener to create thet trail.
page.js
page.mod...
1
...2
3
const getBlocks = () => {4
const blockSize = windowsWidth * 0.05;5
const nbOfBlocks = Math.ceil(window.innerHeight / blockSize);6
return [...Array(nbOfBlocks).keys()].map((_, index) => {7
return <div onMouseEnter={(e) => {colorize(e.target)}} key={index}></div>8
})9
}10
11
const colorize = (el) => {12
el.style.backgroundColor = 'black'13
setTimeout( () => {14
el.style.backgroundColor = 'transparent';15
}, 300)16
}17
18
...
For a final touch, we'll add a blending mode to the text so to have a nice color effect. Thankfully, CSS is extremely powerful for that and will allow us to create this very easily with the mix-blend-mode property.
page.module.css
1
...2
3
.container .body{4
...5
text-transform: uppercase;6
mix-blend-mode: difference;7
color: white;8
}9
That was it for this animation, very fun to see how we can use simple HTML and css to create a trailing effect that looks pixelated.
Hope you learned a lot :)
-Oli