Ripple Shader
A website animation tutorial featuring a ripple shader effect using React Three Fiber, Next.js and React. Inspired by https://homunculus.jp/ and Yuri Artiukh.

Mask Section Transition
New
Background Image Parallax
New
Text Parallax
New
Sticky Footer
Perspective Section Transition
Text Along Path
SVG Path On Scroll
Horizontal Section
Zoom Parallax
Parallax Scroll
Horizontal Scroll
Text Gradient Scroll Opacity v2
Cards Parallax
3D perspective Scroll
SVG Mask Scroll
Smooth Parallax Scroll
Smooth Scroll
Pixel Transition
SVG Morph
Sliding Stairs Menu
Floating Image Gallery
Project Gallery Mouse Hover
Text Gradient Opacity On Scroll
Svg Curve Loading
Text Clip Mask On Scroll
Image slide project gallery
Mouse Image Gallery
Pixel Cursor Trailing
Text Mask Animation
3D Perspective Text
Project Gallery Colored Card
Cartoon Cursor Trailing

Olivier Larose
February 17, 2024
/
Beginner
/
Short
After reviewing my subscribers 404 page, here's how I made mine.
Live DemoSource code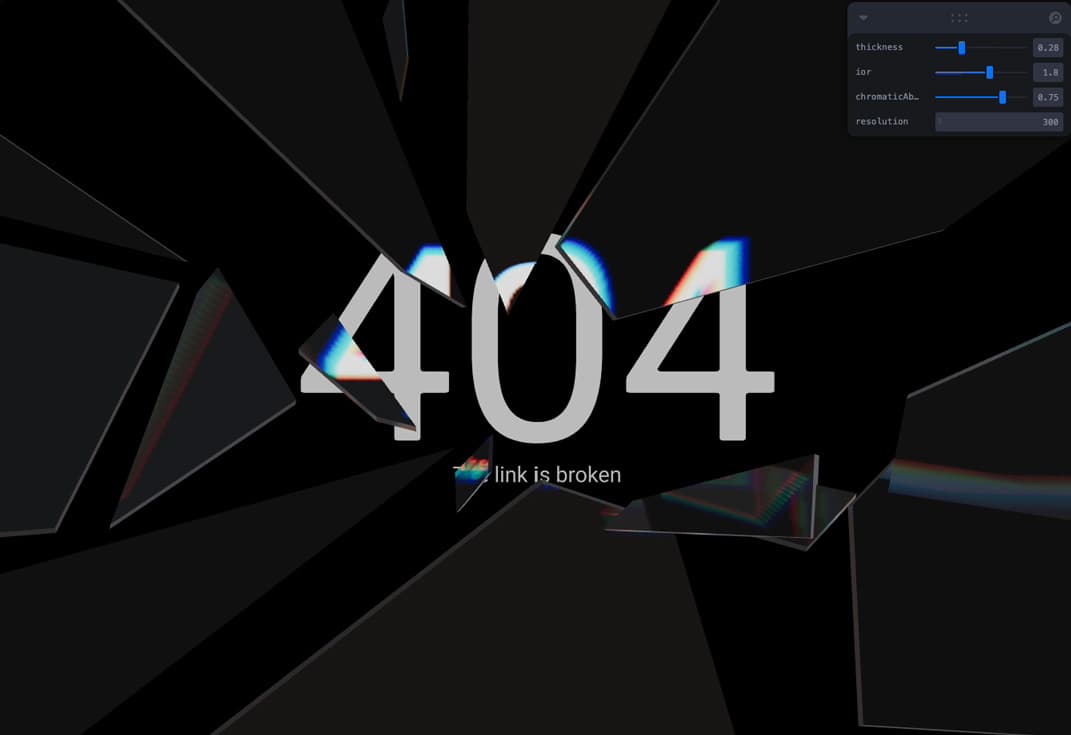
The first step is to go find inspiration on websites like Pinterest, and then we can go inside a software like Illustrator and do a rough sketch of what we want.
Then inside Blender we can re-create that Illustrator Sketch.
When the 3D scene is done, we can export it inside a .GLTF or .GLB file that we can then import inside a Three.js scene.
Let's start the project by creating a Next.js application. We can do that by running npx create-next-app@latest client inside of a terminal.
We can delete everything in the page.js , global.css and page.module.css and add our own HTML and CSS, to start with a nice blank application.
npm i three @react-three/fiber.npm i @react-three/drei.For the scene, I'm creating an external component that I'm lazy loading using the Dynamic import, which is a Next.js built in function.
page.js
1
import dynamic from 'next/dynamic'2
3
const Scene = dynamic(() => import('@/components/Scene'), {4
ssr: false,5
})6
7
export default function Home() {8
return (9
<main className="relative h-screen">10
<Scene />11
</main>12
);13
}
Note: Here I use the ssr: false option to force the component to strictly be rendered client-side.
Here I'm creating a React Three Fiber Canvas and inside of it I'm adding an external Model Component where I'll render the 3D models.
I also add a basic light with an Environment to add lighting and colors to the overall scene.
Scene.jsx
1
'use client';2
import { Canvas } from '@react-three/fiber'3
import Model from './Model'4
import { Environment } from '@react-three/drei'5
6
export default function Scene() {7
return (8
<Canvas orthographic style={{background: "black"}} camera={{position: [0, 0, 1], zoom: 800}}>9
<Model />10
<directionalLight intensity={3} position={[0, 0.1, 1]} />11
<Environment preset="city"/>12
</Canvas>13
)14
}
For the model, I simply import the .GLB file and map all the nodes inside of it. All the nodes are essentially all the different mesh created inside of Blender. Inside of those nodes is a bunch of information about position, scale, etc.
Model.jsx
1
import { useGLTF } from '@react-three/drei'2
import React from 'react'3
import { useThree } from '@react-three/fiber'4
import { MeshBasicMaterial } from 'three'5
6
export default function Model() {7
const { viewport } = useThree()8
const { nodes } = useGLTF('/medias/shards.glb')9
10
return (11
<group scale={viewport.width / 1.5} >12
{13
nodes.Scene.children.map( (mesh, i) => {14
return <Mesh data={mesh} key={i}/>15
})16
}17
</group>18
)19
}20
21
function Mesh({data}) {22
return (23
<mesh {...data}>24
<MeshBasicMaterial/>25
</mesh>26
)27
}

For this particular animation, we need to text to be part of the 3D scene, so we can't simply return DOM elements.
So for that I'll use the Text from React Three Drei.
Model.js...
Model.js...
1
function Font() {2
const src = '/fonts/PPNeueMontreal-Bold.otf'3
const textOption = {4
color: "white",5
anchorX: "center",6
anchorY: "middle"7
}8
return (9
<group>10
<Text font={src} position={[0, 0, -.1]} fontSize={0.4} {...textOption}>11
40412
</Text>13
<Text font={src} position={[0, -.15, -.1]} fontSize={0.03} {...textOption}>14
The link is broken15
</Text>16
</group>17
)18
}
For the float animation, we can also use a utilitary function from React Three Drei called Float.
Model.jsx
1
function Mesh({data}) {2
return (3
<Float>4
<mesh {...data}>5
<MeshTransmissionMaterial/>6
</mesh>7
</Float>8
)9
}
For the transmission material, if you want transparency as well as distortion, you would have to do a custom shader. Thankfully, there is one made by the community inside the React Three Drei package called MeshTransmissionMaterial which gives us everything we need out of the box.
It's basically an extension of the Three.js MeshPhysicalMaterial, which already support transmission but adds on top of it multiple other properties like thickness, distortion and chromaticAberration. These properties really help give a realistic glass effect.
So what I'll do is apply this material each shard of glass of my scene:
Model.jsx
1
function Mesh({data}) {2
3
const materialProps = useControls({4
thickness: { value: 0.275, min: 0, max: 1, step: 0.01 },5
ior: { value: 1.8, min: 0, max: 3, step: 0.1 },6
chromaticAberration: { value: 0.75, min: 0, max: 1},7
resolution: {value: 300},8
})9
10
return (11
<Float>12
<mesh {...data}>13
<MeshTransmissionMaterial roughness={0} transmission={0.99} {...materialProps}/>14
</mesh>15
</Float>16
)17
}
Note: This animation is not optimized, since the MeshTransmissionMaterial takes a lot of ressources and is used on multiple mesh, it would be good to spend some time optizing the scene for a real world application.
Something I was thinking of exploring:
buffer option with a renderTargetThat's it for this tutorial!
I'm just taken away by how powerful and easy to use this material is. I'm super grateful of being part of such a great community as well. Hope you learned something!
-Oli
April 21, 2024
A website animation tutorial featuring a ripple shader effect using React Three Fiber, Next.js and React. Inspired by https://homunculus.jp/ and Yuri Artiukh.

April 21, 2024
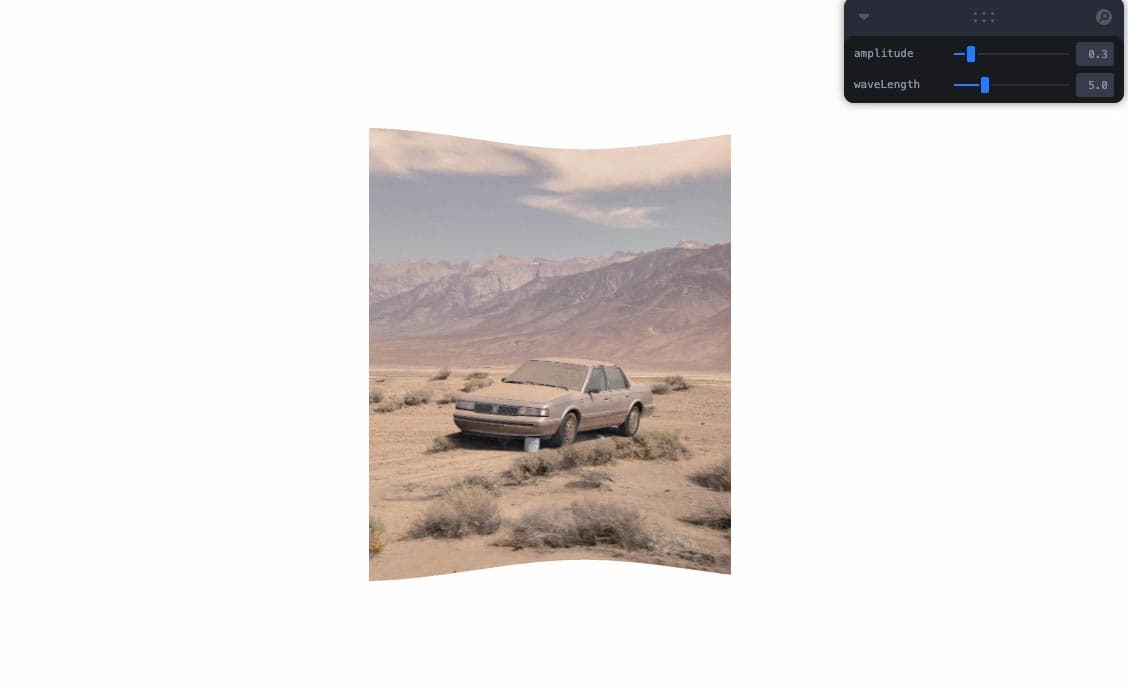
A website tutorial featuring a bulge distortion animation, made with a shader in GLSL, using React Three Fiber, Next.js and React.
April 18, 2024
A website animation tutorial featuring a vertex shader with a wave animation applied on a plane. Made with React-three-fiber, Framer Motion and Next.js