Mouse Image Distortion
A website animation featuring an image distortion in a curved, using the sin function, React, React Three Fiber and Framer Motion

Mask Section Transition
New
Background Image Parallax
New
Text Parallax
New
Sticky Footer
Perspective Section Transition
Text Along Path
SVG Path On Scroll
Horizontal Section
Zoom Parallax
Parallax Scroll
Horizontal Scroll
Text Gradient Scroll Opacity v2
Cards Parallax
3D perspective Scroll
SVG Mask Scroll
Smooth Parallax Scroll
Smooth Scroll
Pixel Transition
SVG Morph
Sliding Stairs Menu
Floating Image Gallery
Project Gallery Mouse Hover
Text Gradient Opacity On Scroll
Svg Curve Loading
Text Clip Mask On Scroll
Image slide project gallery
Mouse Image Gallery
Pixel Cursor Trailing
Text Mask Animation
3D Perspective Text
Project Gallery Colored Card
Cartoon Cursor Trailing

Olivier Larose
May 13, 2023
/
Intermediate
/
Medium
A mouse moving image gallery that features a collection of images that gradually appears as the mouse move. Made with React in a Next.js environment. Inspired by https://bridget.pictures/ and images taken by Kin Coedel.
Live DemoSource codeVideo Tutorial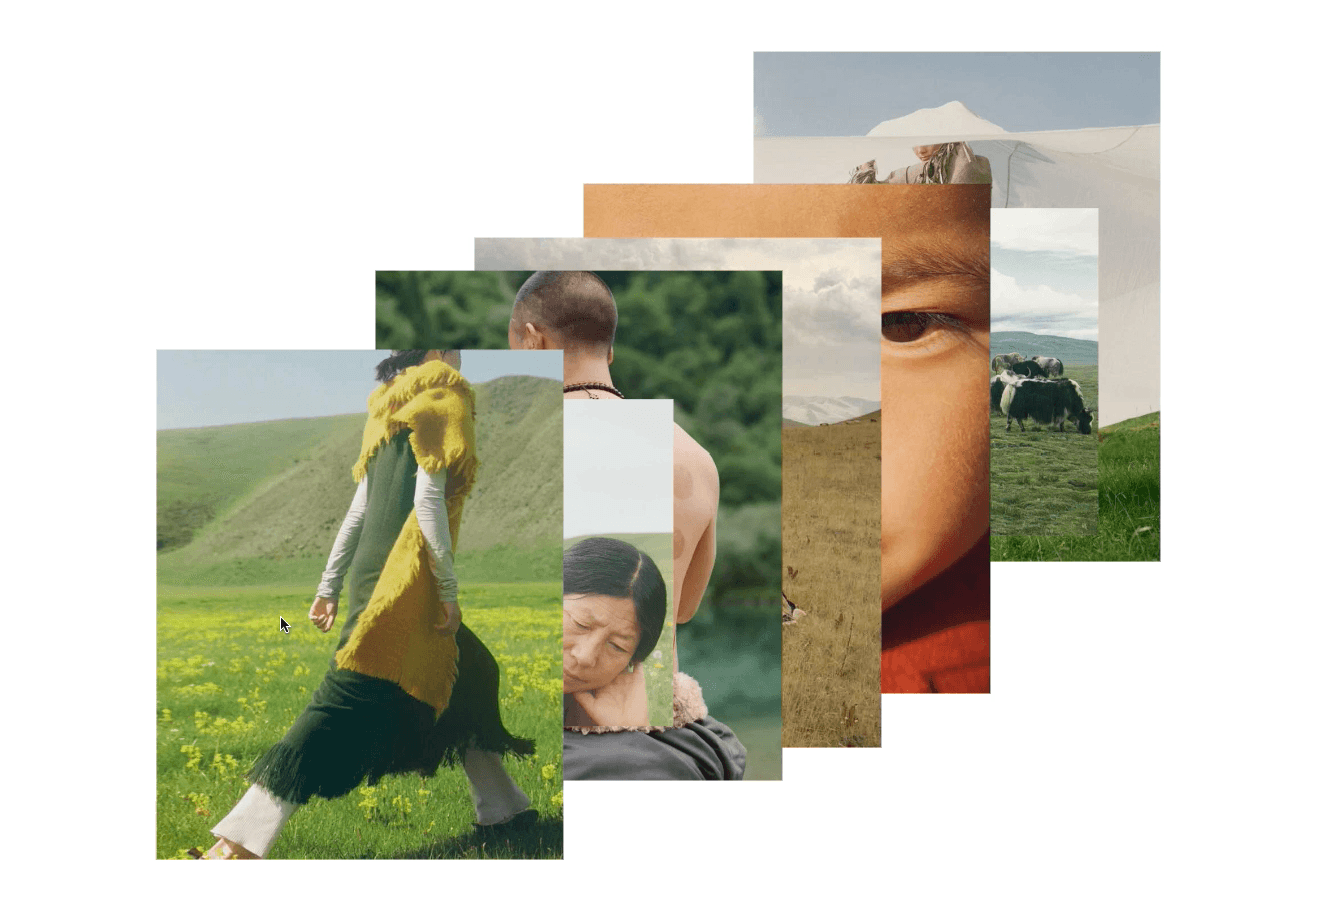
Let's start the project by creating a Next.js application. We can do that by running npx create-next-app myApp inside of a terminal.
We can delete everything in the page.js , global.css and page.module.css and add our own HTML and CSS, to start with a nice blank application.
The first thing we can do now is to render all the images. Initially, we will put them all with a display:none. You can find the images I used here.
/public/images.page.js
page.mod...
1
'use client'2
import styles from './page.module.css'3
import { useRef } from 'react';4
5
export default function Home() {6
7
let refs = []8
9
return (10
<main className={styles.main}>11
{12
[...Array(19).keys()].map( (_, index) => {13
const ref = useRef(null);14
refs.push(ref)15
return <img key={index} ref={ref} src={`/images/${index}.jpg`}></img>16
})17
}18
</main>19
)20
}
Couple notes about the above code:
/public/images folder, so we can create an Array of 19 empty elements and map it.After that, we should still see nothing, since we put all the images in display:none.
To move the images along with the cursor, we'll add a mouse event on the main container. We will then move the image at the position of the cursor.
Since we do not want to move the images at each mouse mouse event trigger, we'll add a step mechanism to slow down the pace at which the images move.
Also, to make it look clean, we add transform: translateX(-50%) translateY(-50%) on the images to center them on the cursor.
We should have something like this:
page.js
page.mod...
1
...2
let refs = []3
let currentIndex = 0;4
let steps = 0;5
let nbOfImages = 0;6
7
const manageMouseMove = (e) => {8
const { clientX, clientY, movementX, movementY } = e;9
10
steps+= Math.abs(movementX) + Math.abs(movementY);11
12
if(steps >= currentIndex * 150){13
moveImage(clientX, clientY)14
}15
16
if(currentIndex == refs.length){17
currentIndex = 0;18
steps = -150;19
}20
}21
22
const moveImage = (x, y) => {23
const currentImage = refs[currentIndex].current;24
currentImage.style.left = x + "px";25
currentImage.style.top = y + "px";26
currentImage.style.display = "block";27
currentIndex++;28
nbOfImages++;29
}30
31
return (32
<main onMouseMove={(e) => {manageMouseMove(e)}} className={styles.main}>33
...
Couple notes about the above code:
steps by the amount of movement from the cursor. When it reaches a movement of 150px in either direction (x or y), we move the next image.currentIndex to 0 to loop back to the first imagesteps to -150, so that an image does not immediately appear on the next mouse event move.To fix them, we will start by creating a utilitary function that will get the current showm images.
To help us remove the images and fix the overlapping issue, we can create a function that will return all images that are currently shown. This will help us reduce the complexity of the code.
page.js
1
...2
//Returns an array of the current img elements shown3
const getCurrentImages = () => {4
let images = []5
let indexOfFirst = currentIndex - nbOfImages;6
for(let i = indexOfFirst ; i < currentIndex ; i++){7
let targetIndex = i;8
if(targetIndex < 0) targetIndex += refs.length9
images.push(refs[targetIndex].current);10
}11
return images;12
}13
...
With that helper function, we can now easily set a max number of images and remove the first image of our stack.
page.js
1
...2
let maxNumberOfImages = 8;3
4
const manageMouseMove = (e) => {5
6
if(steps >= currentIndex * 150){7
...8
if(nbOfImages == maxNumberOfImages){9
removeImage();10
}11
...12
}13
}14
15
const removeImage = () => {16
const images = getCurrentImages();17
images[0].style.display = "none";18
nbOfImages--;19
}20
...21
Now we have a pretty nice animations, but we still have an overlapping problem.
With the help of our helper function, we can easily set the zIndex after moving an image:
page.js
1
const moveImage = (x, y) => {2
...3
setZIndex()4
}5
6
const setZIndex = () => {7
const images = getCurrentImages();8
for(let i = 0 ; i < images.length ; i++){9
images[i].style.zIndex = i;10
}11
}
That was it for this animation, a visually striking animation that's quite easy to do! A nice animation for photography portfolio or highly visual projects.
Hope you learned a lot :)
-Oli
June 2, 2024
A website animation featuring an image distortion in a curved, using the sin function, React, React Three Fiber and Framer Motion

May 4, 2024
A website tutorial on making a paint reveal / erasing effect using the destination out blend mode of the canvas API, made with React and Next.js
March 8, 2024
A website tutorial featuring a moving cursor on mouse move, colored with CSS blend mode difference, made with React and GSAP. Inspired by https://trionn.com/