Mouse Image Distortion
A website animation featuring an image distortion in a curved, using the sin function, React, React Three Fiber and Framer Motion

Olivier Larose
March 8, 2024
/
Intermediate
/
Medium
A website tutorial featuring a moving cursor on mouse move, colored with CSS blend mode difference, made with React and GSAP. Inspired by https://trionn.com/
Live DemoSource code
Let's start the project by creating a Next.js application. We can do that by running npx create-next-app@latest client inside of a terminal.
npm i gsap.To track the mouse there would be mutliple ways of doing it. For this tutorial tho, I'll eventually use the requestAnimationFramer to move the cursor around, which is one of the most performance effective way of doing it.
Since I'm doing it that way, I'll store the position of the cursor inside a ref, instead of inside a state and will imperitavely change the styling:
Cursor.jsx
1
'use client';2
import React, { useEffect, useRef } from 'react'3
import gsap from 'gsap';4
5
export default function BlurryCursor() {6
const mouse = useRef({x: 0, y: 0});7
const circle = useRef();8
const size = 30;9
10
const manageMouseMove = (e) => {11
const { clientX, clientY } = e;12
13
mouse.current = {14
x: clientX,15
y: clientY16
}17
18
moveCircle(mouse.current.x, mouse.current.y);19
}20
21
const moveCircle = (x, y) => {22
gsap.set(circle.current, {x, y, xPercent: -50, yPercent: -50})23
}24
25
useEffect( () => {26
window.addEventListener("mousemove", manageMouseMove);27
return () => {28
window.removeEventListener("mousemove", manageMouseMove);29
}30
}, [])31
32
return (33
<div className='relative h-screen'>34
<div35
ref={circle}36
style={{37
backgroundColor: "#BCE4F2",38
width: size,39
height: size,40
}}41
className='top-0 left-0 fixed rounded-full'42
/>43
</div>44
)45
}
To make the movement of the cursor smoother, we'll use a combination of requestAnimationFrame and a linear interpolation.
Linear interpolation is a key concept in animations. It is often used by motion designers, but we can also use it for web animations! In short, it is form of interpolation, which involves the generation of new values based on an existing set of values
Lerp in Javascript
1
let value = 10;2
3
const lerp = (x, y, a) => x * (1 - a) + y * a4
value = lerp(value, 0, 0.1);5
6
console.log(value)7
//9
x: The value we want to interpolate from (start)y: The target value we want to interpolate to (end)a: The amount by which we want x to be closer to y.We can now use that function to add a delayedMouse object which we will use to move the circle around:
Cursor.jsx
1
const manageMouseMove = (e) => {2
const { clientX, clientY } = e;3
4
mouse.current = {5
x: clientX,6
y: clientY7
}8
}9
10
const animate = () => {11
const { x, y } = delayedMouse.current;12
13
delayedMouse.current = {14
x: lerp(x, mouse.current.x, 0.075),15
y: lerp(y, mouse.current.y, 0.075)16
}17
18
moveCircle(delayedMouse.current.x, delayedMouse.current.y);19
rafId.current = window.requestAnimationFrame(animate);20
}21
22
const moveCircle = (x, y) => {23
gsap.set(circle.current, {x, y, xPercent: -50, yPercent: -50})24
}
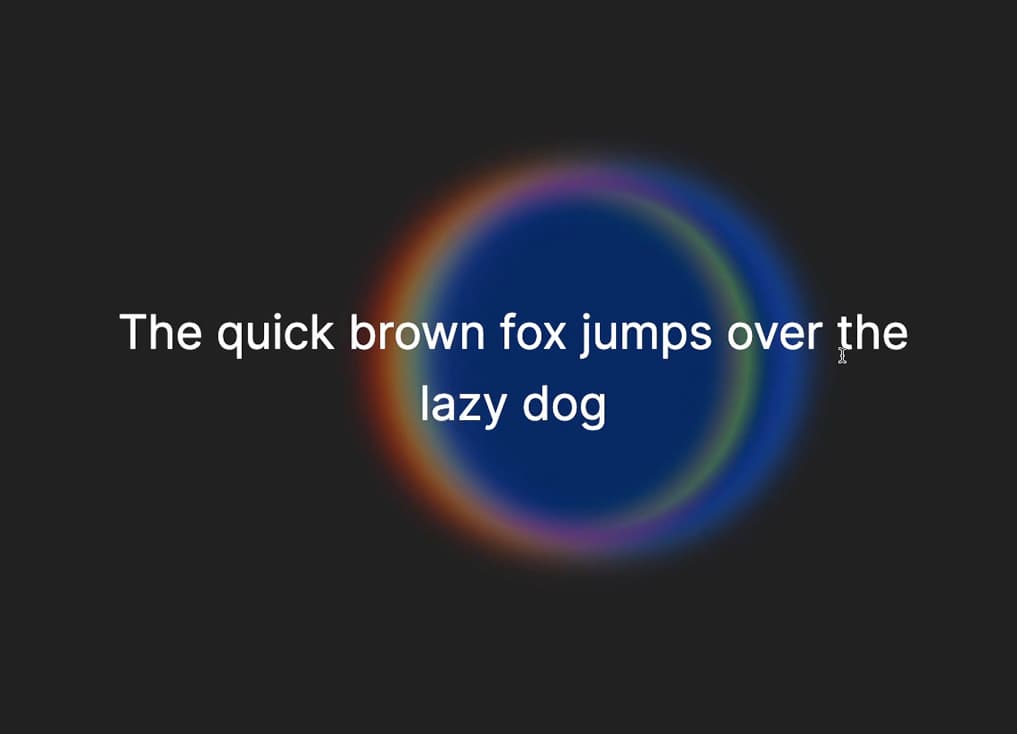
The next thing is to figure out if we're hovering the text, and if so we can start dynamically changing the properties of the cursor.
page.js
1
'use client';2
import React from 'react'3
import Cursor from "@/components/Cursor";4
import { useState } from 'react';5
6
export default function Scene2() {7
const [isActive, setIsActive] = useState(false);8
return (9
<div className='h-[100vh] flex items-center justify-center'>10
<h1 onMouseOver={() => {setIsActive(true)}} onMouseLeave={() => {setIsActive(false)}} className="text-[4.5vw] max-w-[90vw] text-center text-white p-20">The quick brown fox jumps over the lazy dog</h1>11
<Cursor isActive={isActive}/>12
</div>13
)14
}
Cursor.jsx
1
export default function BlurryCursor({isActive}) {2
...3
const size = isActive ? 400 : 30;4
5
useEffect( () => {6
animate();7
window.addEventListener("mousemove", manageMouseMove);8
return () => {9
window.removeEventListener("mousemove", manageMouseMove);10
window.cancelAnimationFrame(rafId.current)11
}12
}, [isActive])13
14
return (15
<div className='relative h-screen'>16
<div17
style={{18
backgroundColor: "#BCE4F2",19
width: size,20
height: size,21
filter: `blur(${isActive ? 30 : 0}px)`,22
transition: `height 0.3s ease-out, width 0.3s ease-out, filter 0.3s ease-out`23
}}24
className='top-0 left-0 fixed rounded-full mix-blend-difference pointer-events-none'25
ref={circle}26
/>27
</div>28
)29
}
This is a variation of the animation, where we add multiple colored circles to make them blend together using the mix blend mode.
Cursor.jsx
1
...2
3
const colors = [4
"#c32d27",5
"#f5c63f",6
"#457ec4",7
"#356fdb",8
]9
10
const circles = useRef([]);11
12
const moveCircles = (x, y) => {13
if(circles.current.length < 1) return;14
circles.current.forEach((circle, i) => {15
gsap.set(circle, {x, y, xPercent: -50, yPercent: -50})16
})17
}18
19
return (20
<div className='relative h-screen'>21
{22
[...Array(4)].map((_, i) => {23
return (24
<div25
style={{26
backgroundColor: colors[i],27
width: size,28
height: size,29
filter: `blur(${isActive ? 20 : 2}px)`,30
transition: `transform ${(4 - i) * delay}s linear, height 0.3s ease-out, width 0.3s ease-out, filter 0.3s ease-out`31
}}32
className='top-0 left-0 fixed rounded-full mix-blend-difference'33
key={i}34
ref={ref => circles.current[i] = ref}35
/>)36
})37
}38
</div>39
)
Note:
As simple as this!
Hope you liked the animation, it's crazy what we can create with simple css properties and an animated cursor. Hope you learned something!
-Oli