Mouse Image Distortion
A website animation featuring an image distortion in a curved, using the sin function, React, React Three Fiber and Framer Motion

Mask Section Transition
New
Background Image Parallax
New
Text Parallax
New
Sticky Footer
Perspective Section Transition
Text Along Path
SVG Path On Scroll
Horizontal Section
Zoom Parallax
Parallax Scroll
Horizontal Scroll
Text Gradient Scroll Opacity v2
Cards Parallax
3D perspective Scroll
SVG Mask Scroll
Smooth Parallax Scroll
Smooth Scroll
Pixel Transition
SVG Morph
Sliding Stairs Menu
Floating Image Gallery
Project Gallery Mouse Hover
Text Gradient Opacity On Scroll
Svg Curve Loading
Text Clip Mask On Scroll
Image slide project gallery
Mouse Image Gallery
Pixel Cursor Trailing
Text Mask Animation
3D Perspective Text
Project Gallery Colored Card
Cartoon Cursor Trailing

Olivier Larose
April 13, 2023
/
Intermediate
/
Medium
A common svg wave animation seen in a lot of awwwards website. Made with React, Next.js and the Sine function. Inspired by https://hello.cuberto.com
Live DemoSource code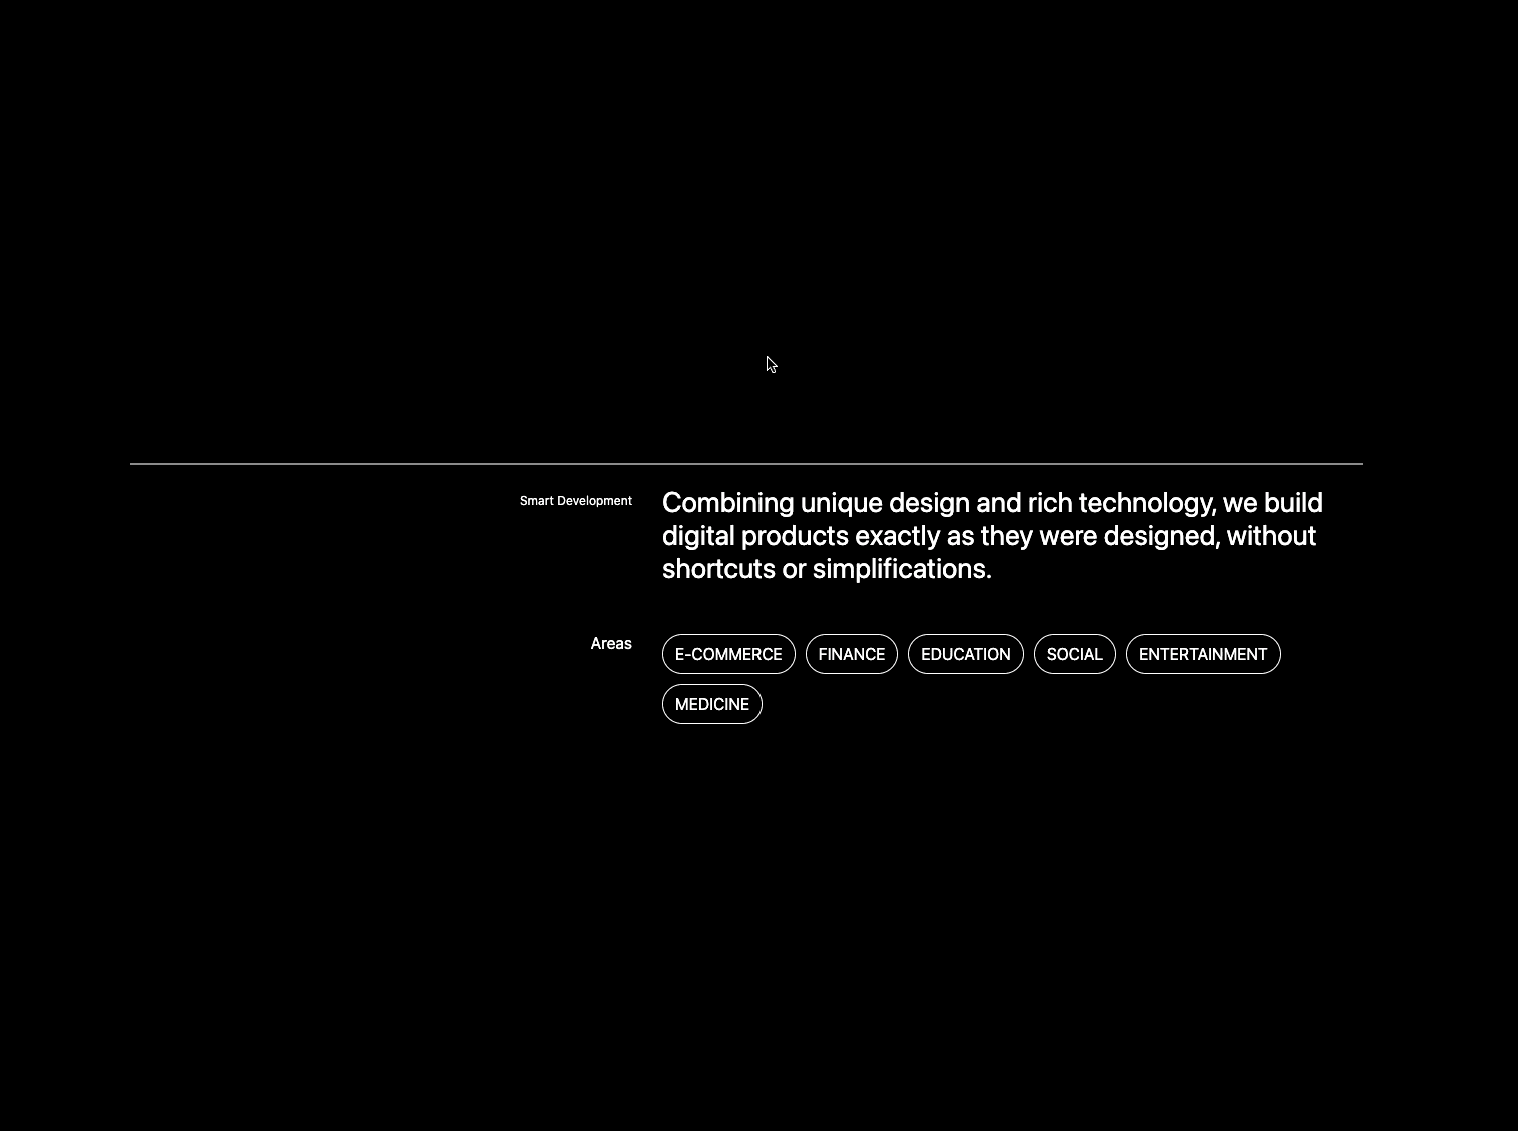
Let's start the project by creating a Next.js application. We can do that by running npx create-next-app@latest client inside of a terminal.
We can delete everything in the page.js , global.css and page.module.css and add our own HTML and CSS, to start with a nice blank application.
page.js
page.mod...
1
'use client'2
import styles from './page.module.css'3
4
export default function Home() {5
return (6
<div className={styles.container}>7
<div className={styles.body}>8
<div className={styles.description}>9
<p>Smart Development</p>10
<p>Combining unique design and rich technology, we build digital products exactly as they were designed, without shortcuts or simplifications.</p>11
</div>12
<div className={styles.tagsContainer}>13
<p>Areas</p>14
<div className={styles.tags}>15
<p>E-commerce</p>16
<p>Finance</p>17
<p>Education</p>18
<p>Social</p>19
<p>Entertainment</p>20
<p>Medicine</p>21
</div>22
</div>23
</div>24
</div>25
)26
}27


1
<path d="M100,250 Q250,180 400,250" />
The <path> element is a basic element of the SVG library, it is used to create lines, curves and arcs. The d attribute contains a series of commands
More specifically, the SVG we will use contains two commands:
M x y takes two parameters, a coordinate (x) and coordinate (y) to move toQ x1 y1, x y requires one control point which determines the slope of the curve at both the start point and the end point. It takes two parameters: the control point and the end point of the curve.Now that we understand the basic concepts of a quadratic Bézier curve, we can create our own.

page.js
page.mod...
1
...2
const path = useRef(null);3
let progress = 0;4
let x = 0.5;5
6
useEffect(() => {7
setPath(progress);8
window.addEventListener('resize', () => {9
setPath(progress);10
})11
}, [])12
13
const setPath = (value) => {14
const width = window.innerWidth * 0.7;15
path.current.setAttributeNS(null, "d", "M 0 50 Q ${width * x} ${50 + value} ${width} 50")16
}17
18
return (19
<div className={styles.container}>20
<div className={styles.body}>21
<div className={styles.line}>22
<span className={styles.box}></span>23
<svg>24
<path ref={path}></path>25
</svg>26
</div>27
<div className={styles.description}>28
<p>Smart Development</p>29
<p>Combining unique design and rich technology, we build digital products exactly as they were designed, without shortcuts or simplifications.</p>30
</div>31
<div className={styles.tagsContainer}>32
<p>Areas</p>33
<div className={styles.tags}>34
<p>E-commerce</p>35
<p>Finance</p>36
<p>Education</p>37
<p>Social</p>38
<p>Entertainment</p>39
<p>Medicine</p>40
</div>41
</div>42
</div>43
</div>44
)
Line 15 is key to clearly understand how the animation will be created:
100px. We can then understand that 50 (in the y axis) is the middle of the SVG where the path will be.width * x and 50 + value is the control point (x1 y1) of the Bézier curve. We will dynamically adjust the x (position of the slope) and the value (strength of the slope) to animate the curve.value = 100, x = 0.5
value = 100, x = 0
value = -100, x = 1
We want to have a small box at first so that the animation is only triggered from a close distance. Then, we want to expand the height of the box to allow the user to slope the curve at a bigger range than the initial detection.
page.js
page.mod...
1
...2
let progress = 0;3
let reqId = null;4
5
const animateIn = () => {6
setPath(progress);7
reqId = requestAnimationFrame(animateIn);8
}9
10
const manageMouseMove = (e) => {11
const { movementY } = e;12
const box = e.target.getBoundingClientRect();13
x = (e.clientX - box.left) / box.width;14
progress += movementY;15
}16
17
const resetAnimation = () => {18
cancelAnimationFrame(reqId)19
}20
return (21
...22
<span onMouseEnter={() => {animateIn()}} onMouseLeave={() => {resetAnimation()}} onMouseMove={(e) => {manageMouseMove(e)}} className={styles.box}></span>23
...24
)25
26
To animate out the animation, we will use two key animation concepts: The Sine function and the Linear Interpolation. Let's talk a brief look at them.
I found that the Sine function is used a lot in web animations, so don't shy away from it even tho it might be scary at first. Basically, there are 2 important things to know about the Sine function for this specific animation:
-1 and 11 when we give it π/2
Linear interpolation is a key concept in animations. It is often used by motion designers, but we can also use it for web animations! In short, it is form of interpolation, which involves the generation of new values based on an existing set of values

Lerp in Javascript
1
let value = 10;2
3
const lerp = (x, y, a) => x * (1 - a) + y * a4
value = lerp(value, 0, 0.1);5
6
console.log(value)7
//9
x: The value we want to interpolate from (start)y: The target value we want to interpolate to (end)a: The amount by which we want x to be closer to y.Great. Now we can jump in the code and understand exactly what's going on.
page.js
1
...2
let time = Math.PI / 2;3
4
const animateIn = () => {5
//if the animationOut is running, cancel it and reset time6
if(reqId){7
cancelAnimationFrame(reqId);8
time = Math.PI / 2;9
}10
setPath(progress);11
reqId = requestAnimationFrame(animateIn);12
}13
14
const resetAnimation = () => {15
cancelAnimationFrame(reqId)16
animateOut();17
}18
19
const lerp = (x, y, a) => x * (1 - a) + y * a;20
21
const animateOut = () => {22
let newProgress = progress * Math.sin(time);23
setPath(newProgress)24
25
progress = lerp(progress, 0, .04);26
time+=0.2;27
28
if(Math.abs(progress) > 0.5){29
reqId = requestAnimationFrame(animateOut)30
}31
//If the slope is almost flat, we stop the animation32
else{33
time = Math.PI / 2;34
progress = 0;35
}36
}
Line 6: To avoid any bugs, we want to cancel the animationOut if it is already running when we animateIn.
The key concepts of the animationOut:
time is initially set at π/2. Since Math.sin(π/2) = 1, we want our first animation frame to be the current value of the slope (see line 22).progress, which is the slope value, is gradually decremented towards 0 using the lerp function.time is incremented by 0.2 for speed reason. It could be incremented by 100 and it would still work, but the animation would be very fast.We are done! In conclusion, we used the Linear Interpolation, the Sine function and the Quadratic Cubiz Bézier in order to create this simple, yet common animation among award winning websites.
Hope you learned a lot :)
- Oli
June 2, 2024
A website animation featuring an image distortion in a curved, using the sin function, React, React Three Fiber and Framer Motion

May 4, 2024
A website tutorial on making a paint reveal / erasing effect using the destination out blend mode of the canvas API, made with React and Next.js
March 8, 2024
A website tutorial featuring a moving cursor on mouse move, colored with CSS blend mode difference, made with React and GSAP. Inspired by https://trionn.com/