Svg Curve Loading
A loading screen using an animated curved SVG using React and Next.js

Mask Section Transition
New
Background Image Parallax
New
Text Parallax
New
Sticky Footer
Perspective Section Transition
Text Along Path
SVG Path On Scroll
Horizontal Section
Zoom Parallax
Parallax Scroll
Horizontal Scroll
Text Gradient Scroll Opacity v2
Cards Parallax
3D perspective Scroll
SVG Mask Scroll
Smooth Parallax Scroll
Smooth Scroll
Pixel Transition
SVG Morph
Sliding Stairs Menu
Floating Image Gallery
Project Gallery Mouse Hover
Text Gradient Opacity On Scroll
Svg Curve Loading
Text Clip Mask On Scroll
Image slide project gallery
Mouse Image Gallery
Pixel Cursor Trailing
Text Mask Animation
3D Perspective Text
Project Gallery Colored Card
Cartoon Cursor Trailing

Olivier Larose
October 1, 2023
/
Beginner
/
Short
A web animation tutorial featuring a centered, horizontal and vertical pixel transition effect using Next.js and Framer Motion
Live DemoSource code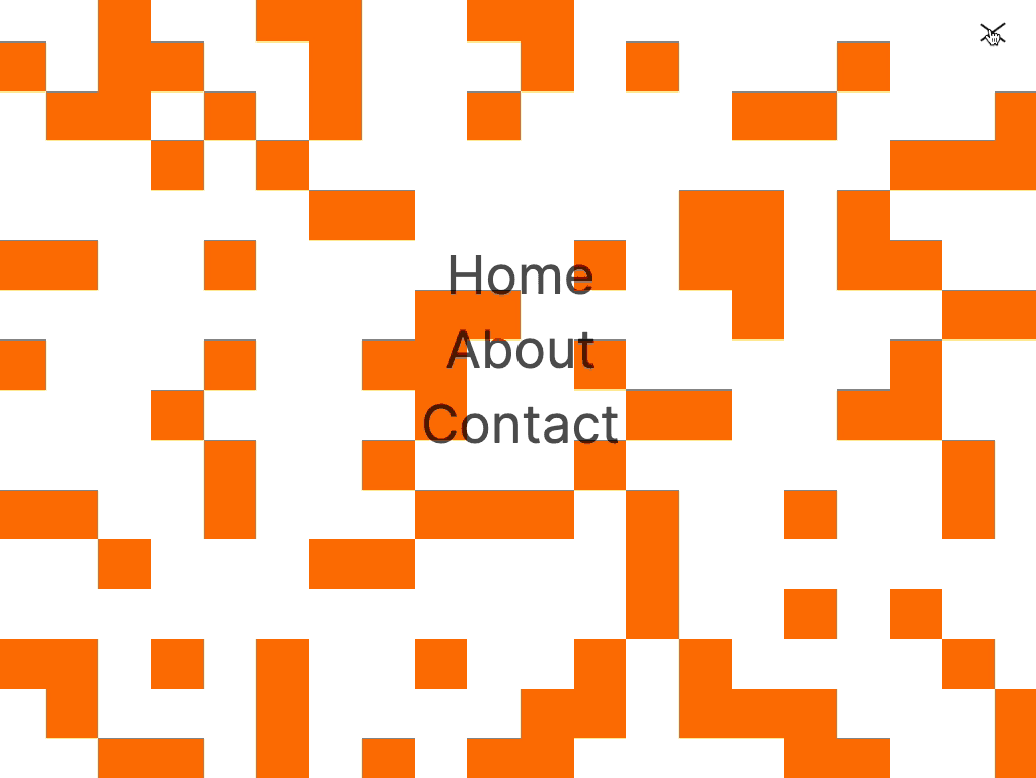
Let's start the project by creating a Next.js application. We can do that by running npx create-next-app@latest client inside of a terminal.
We can delete everything in the page.js , global.css and page.module.css and add our own HTML and CSS, to start with a nice blank application.
npm i sass.npm i framer-motion.The parent component will act as the parent of all the other components. I initially created a Header and a Menu just to have something to begin with.
page.js
1
'use client';2
import styles from './page.module.scss'3
import { useState } from 'react';4
import Header from '../components/header';5
import Menu from '../components/menu';6
7
export default function Home() {8
const [menuIsActive, setMenuIsActive] = useState(false);9
return (10
<main className={styles.main}>11
<Header menuIsActive={menuIsActive} setMenuIsActive={setMenuIsActive}/>12
<Menu menuIsActive={menuIsActive}/>13
</main>14
)15
}
The Header Component is a simple burger menu that toggles a state coming from its parent.
componen...
componen...
1
import styles from './style.module.scss';2
3
export default function Index({menuIsActive, setMenuIsActive}) {4
return (5
<div className={styles.header}>6
<div onClick={() => {setMenuIsActive(!menuIsActive)}} className={`${styles.burger} ${menuIsActive ? styles.burgerActive : ""}`}>7
</div>8
</div>9
)}
The Menu Component is a simple 3 words menu that appears if the state is active.
componen...
componen...
1
import React from 'react'2
import styles from './style.module.scss';3
import { motion } from 'framer-motion';4
5
const anim = {6
initial: {7
opacity: 08
},9
open: {10
opacity: 111
},12
exit: {13
opacity: 014
}15
}16
17
export default function index({menuIsActive}) {18
return (19
<motion.div20
className={styles.menu}21
variants={anim}22
initial="initial"23
animate={menuIsActive ? "open" : "closed"}24
>25
<p>Home</p>26
<p>About</p>27
<p>Contact</p>28
</motion.div>29
)30
}
Since we'll need the width and height of the window to create the animation, the first thing we need to do is to put the dimensions of the window inside a state. We can do that inside the parent and pass it down the pixel transition components.
page.js
1
...2
import CenteredPixelTransition from '../components/pixelTransition/centered';3
4
export default function Home() {5
const [menuIsActive, setMenuIsActive] = useState(false);6
const [dimensions, setDimensions] = useState({width:0, height: 0});7
8
const updateDimensions = () => {9
const { innerWidth, innerHeight } = window;10
setDimensions({width: innerWidth, height: innerHeight})11
}12
useEffect( () => {13
updateDimensions();14
window.addEventListener('resize', updateDimensions);15
return () => window.removeEventListener('resize', updateDimensions)16
}, [])17
18
return (19
<main className={styles.main}>20
...21
{ dimensions.height > 0 && <CenteredPixelTransition menuIsActive={menuIsActive} dimensions={dimensions}/> }22
</main>23
)24
}
pixelTra...
pixelTra...
1
import React, { useState, useEffect } from 'react'2
import styles from './style.module.scss';3
import { motion } from 'framer-motion';4
5
const anim = {6
initial: {7
opacity: 08
},9
open: (i) => ({10
opacity: 1,11
transition: {duration: 0, delay: 0.03 * i}12
}),13
closed: (i) => ({14
opacity: 0,15
transition: {duration: 0, delay: 0.03 * i}16
})17
}18
19
export default function index({menuIsActive, dimensions}) {20
const { width, height } = dimensions;21
22
/**23
* Shuffles array in place (Fisher–Yates shuffle).24
* @param {Array} a items An array containing the items.25
*/26
const shuffle = (a) => {27
var j, x, i;28
for (i = a.length - 1; i > 0; i--) {29
j = Math.floor(Math.random() * (i + 1));30
x = a[i];31
a[i] = a[j];32
a[j] = x;33
}34
return a;35
}36
37
const getBlocks = () => {38
const { innerWidth, innerHeight } = window;39
const blockSize = innerWidth * 0.05;40
const nbOfBlocks = Math.ceil(innerHeight / blockSize);41
const shuffledIndexes = shuffle([...Array(nbOfBlocks)].map( (_, i) => i))42
return shuffledIndexes.map( (randomIndex, index) => {43
return (44
<motion.div45
key={index}46
className={styles.block}47
variants={anim}48
initial="initial"49
animate={menuIsActive ? "open" : "closed"}50
custom={randomIndex}51
/>52
)53
})54
}55
56
return (57
<div className={styles.pixelBackground}>58
{59
[...Array(20)].map( (_, index) => {60
return <div key={index} className={styles.column}>61
{62
getBlocks()63
}64
</div>65
})66
}67
</div>68
)69
}
Couple notes about the code :
The Horizontal Transition will be the same as the centered one, but instead I'll just modify the value of the delay.
pixelTransition/horizontal/index.jsx
1
2
import React, { useState, useEffect } from 'react'3
import styles from './style.module.scss';4
import { motion } from 'framer-motion';5
6
const anim = {7
initial: {8
opacity: 09
},10
open: (delay) => ({11
opacity: 1,12
transition: {duration: 0, delay: 0.02 * delay[0]}13
}),14
closed: (delay) => ({15
opacity: 0,16
transition: {duration: 0, delay: 0.02 * delay[1]}17
})18
}19
20
export default function index({menuIsActive, dimensions}) {21
const { width, height } = dimensions;22
/**23
* Shuffles array in place (Fisher–Yates shuffle).24
* @param {Array} a items An array containing the items.25
*/26
const shuffle = (a) => {27
var j, x, i;28
for (i = a.length - 1; i > 0; i--) {29
j = Math.floor(Math.random() * (i + 1));30
x = a[i];31
a[i] = a[j];32
a[j] = x;33
}34
return a;35
}36
37
const getBlocks = (indexOfColum) => {38
const blockSize = width * 0.05;39
const nbOfBlocks = Math.ceil(height / blockSize);40
const shuffledIndexes = shuffle([...Array(nbOfBlocks)].map( (_, i) => i))41
return shuffledIndexes.map( (randomIndex, index) => {42
return (43
<motion.div44
key={index}45
className={styles.block}46
variants={anim}47
initial="initial"48
animate={menuIsActive ? "open" : "closed"}49
custom={[indexOfColum + randomIndex, (20 - indexOfColum + randomIndex)]}50
/>51
)52
})53
}54
55
return (56
<div className={styles.pixelBackground}>57
{58
[...Array(20)].map( (_, index) => {59
return <div key={index} className={styles.column}>60
{61
getBlocks(index)62
}63
</div>64
})65
}66
</div>67
)68
}
Couple notes about the code :
The veritcal transition variant is a little more complicated. I have restructure everything to have rows instead of columns.
pixelTra...
pixelTra...
1
import React, { useState, useEffect } from 'react'2
import styles from './style.module.scss';3
import { motion } from 'framer-motion';4
5
const anim = {6
initial: {7
opacity: 08
},9
open: (delay) => ({10
opacity: 1,11
transition: {duration: 0, delay: 0.02 * delay[1]}12
}),13
closed: (delay) => ({14
opacity: 0,15
transition: {duration: 0, delay: 0.02 * delay[0]}16
})17
}18
19
export default function index({menuIsActive, dimensions}) {20
21
const { width, height } = dimensions;22
/**23
* Shuffles array in place (Fisher–Yates shuffle).24
* @param {Array} a items An array containing the items.25
*/26
const shuffle = (a) => {27
var j, x, i;28
for (i = a.length - 1; i > 0; i--) {29
j = Math.floor(Math.random() * (i + 1));30
x = a[i];31
a[i] = a[j];32
a[j] = x;33
}34
return a;35
}36
37
const getBlocks = (indexOfColum) => {38
const blockSize = height * 0.1;39
const nbOfBlocks = Math.ceil(width / blockSize);40
const shuffledIndexes = shuffle([...Array(nbOfBlocks)].map( (_, i) => i))41
return shuffledIndexes.map( (randomIndex, index) => {42
return (43
<motion.div44
key={index}45
className={styles.block}46
variants={anim}47
initial="initial"48
animate={menuIsActive ? "open" : "closed"}49
custom={[indexOfColum + randomIndex, (10 - indexOfColum + randomIndex)]}50
/>51
)52
})53
}54
55
return (56
<div style={{flexDirection:"column"}} className={styles.pixelBackground}>57
{58
[...Array(10)].map( (_, index) => {59
return <div key={index} className={styles.row}>60
{61
getBlocks(index)62
}63
</div>64
})65
}66
</div>67
)68
}
Couple notes about the code :
That's it for this animation!
Very nice effect that could even be done in Vanilla Javascript since it is so simple! Great concept tho to use the value of an array to create a custom delay. Hope you learned something!
-Oli
May 27, 2023
A loading screen using an animated curved SVG using React and Next.js