Creating the Project
Let's start the project by creating a Next.js application. We can do that by running npx create-next-app@latest client inside of a terminal.
- We will use Framer Motion for the animation, so we can run
npm i framer-motion. - We will use the Lenis Scroll for the smooth scrolling, so we can run
npm i lenis.
Creating 3 Slides
Here I'll create 3 slides with a certain left position to randomize the layout.
- I initialize a Lenis scroll to have a smooth scroll
- I use an
overflow:hidden on the parent to remove the horizontal scroll created by the long slides.
2
import Picture1 from '../../public/images/1.jpg'
3
import Picture2 from '../../public/images/2.jpg'
4
import Picture3 from '../../public/images/3.jpg'
5
import Lenis from 'lenis';
6
import Image from 'next/image';
7
import { useEffect } from 'react';
9
export default function Home() {
12
const lenis = new Lenis()
16
requestAnimationFrame(raf)
19
requestAnimationFrame(raf)
23
<main className='overflow-hidden'>
24
<div className='h-[100vh]'/>
25
<Slide src={Picture1} left={"-40%"}/>
26
<Slide src={Picture2} left={"-25%"}/>
27
<Slide src={Picture3} left={"-75%"}/>
28
<div className='h-[100vh]' />
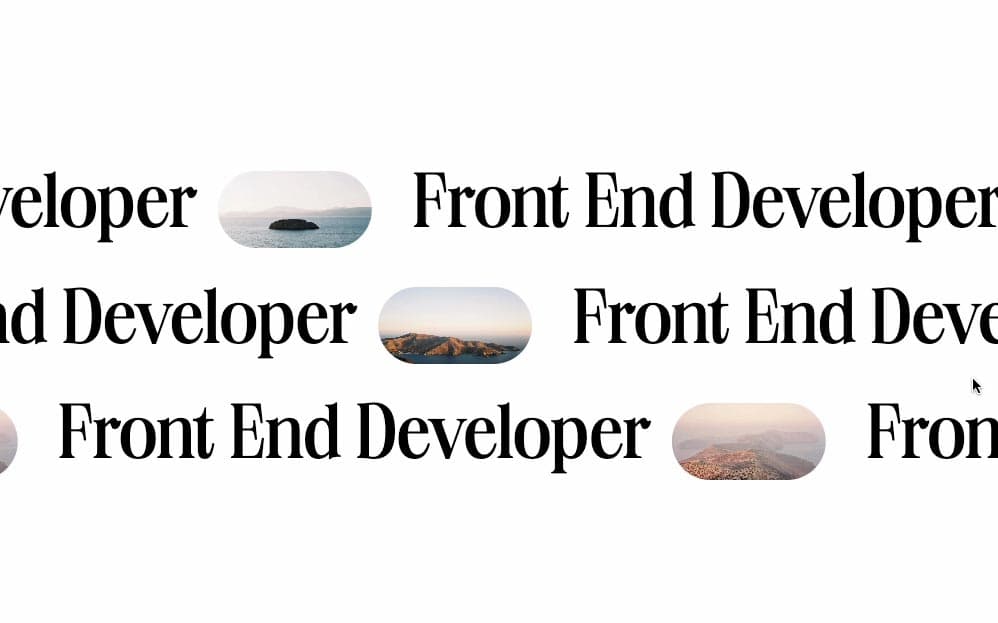
The slides all contain 3 phrases inside of them:
Here the magic property is the white-space set at nowrap. This allows the 3 phrases to overflow outside the container and create a long slide larger than the width of the viewport.
1
const Slide = (props) => {
3
<div style={{left: props.left}} className="relative flex whitespace-nowrap">
4
<Phrase src={props.src}/>
5
<Phrase src={props.src}/>
6
<Phrase src={props.src}/>
11
const Phrase = ({src}) => {
13
<div className={'px-5 flex gap-5 items-center'}>
14
<p className='text-[7.5vw]'>Front End Developer</p>
15
<span className="relative h-[7.5vw] aspect-[4/2] rounded-full overflow-hidden">
16
<Image style={{objectFit: "cover"}} src={src} alt="image" fill/>
We should have something like this:
Tracking the progress of the Scroll
Here I'll use a mix of the useScroll and the useTransform hook from Framer Motion.
The first thing I need to do is track the progress of the scroll, then I can give the progresss of the sroll and a certain direction to each slide.
1
export default function Home() {
3
const container = useRef();
4
const { scrollYProgress } = useScroll({
6
offset: ['start end', 'end start']
10
<main className="overflow-hidden">
11
<div className='h-[100vh]'/>
13
<Slide src={Picture1} direction={'left'} left={"-40%"} progress={scrollYProgress}/>
14
<Slide src={Picture2} direction={'right'} left={"-25%"} progress={scrollYProgress}/>
15
<Slide src={Picture3} direction={'left'} left={"-75%"} progress={scrollYProgress}/>
17
<div className='h-[100vh]' />
Moving the Slides on Scroll
Once I have access to the progress of the scroll and a certain direction, I can use all of that inside the useTransform hook to translate the phrases on scroll.
1
const Slide = (props) => {
2
const direction = props.direction == 'left' ? -1 : 1;
3
const translateX = useTransform(props.progress, [0, 1], [150 * direction, -150 * direction])
6
<motion.div style={{x: translateX, left: props.left}} className="relative flex whitespace-nowrap">
7
<Phrase src={props.src}/>
8
<Phrase src={props.src}/>
9
<Phrase src={props.src}/>
We should have something like this:
Wrapping up
That's it for this animation!
A very common animation that adds a little extra to any website, hope you learned something!
-Oli

