Initializing the project
Let's start the project by creating a Next.js application. We can do that by running npx create-next-app@latest client inside of a terminal.
Adding the HTML and CSS
We can delete everything in the page.js , global.css and page.module.css and add our own HTML and CSS, to start with a nice blank application.
- We will use Framer Motion for the animation, so we can run
npm i framer-motion. - We will use the Lenis Scroll for the smooth scrolling, so we can run
npm i @studio-freight/lenis.
1
import Footer from "@/components/Footer";
3
export default function Home() {
6
<div className="h-[100vh]"></div>
Adding a Sticky Footer
To enhance the effect of the animation, we can start by creating a sticky footer, which will add extra space at the bottom of the window, giving more scrolling time for the path to be moved along a path.
The first step to do that is to get the progress of the scroll. We can do that by using the useScroll hook:
1
import { useScroll } from 'framer-motion';
3
const container = useRef();
4
const { scrollYProgress } = useScroll({
6
offset: ['start end', 'end end']
- scrollYProgress returns a value between
0 and 1 that represents the progress of the scroll based on the target and the offset. - offset: The tracker starts at
['start end'] the start of the target and the end of the window and ends at ['end end'] the end of the target and the end of the window.
The parallax effect is used by mixing the scrollYProgress and the useTransform hook.
1
const y = useTransform(scrollProgress, [0, 1], [-200, 0])
- When the
scrollYProgress is between 0 and 1 then the y value will be between -200 and 0.
Mixing everything together:
2
import React, { useRef } from "react";
3
import { useScroll, useTransform, motion } from 'framer-motion';
5
export default function Footer() {
6
const container = useRef();
7
const { scrollYProgress } = useScroll({
9
offset: ['start end', 'end end']
14
<Logos scrollProgress={scrollYProgress}/>
19
const Logos = ({scrollProgress}) => {
20
const y = useTransform(scrollProgress, [0, 1], [-225, 0])
22
<div className="h-[250px] bg-black overflow-hidden">
23
<motion.div style={{y}} className="h-full bg-black flex justify-center gap-10 items-center p-10">
25
[...Array(5)].map((_, i) => {
26
return <img key={`img_${i}`} className="w-[80px] h-[80px]" src={`/medias/${i+1}.jpg`} />
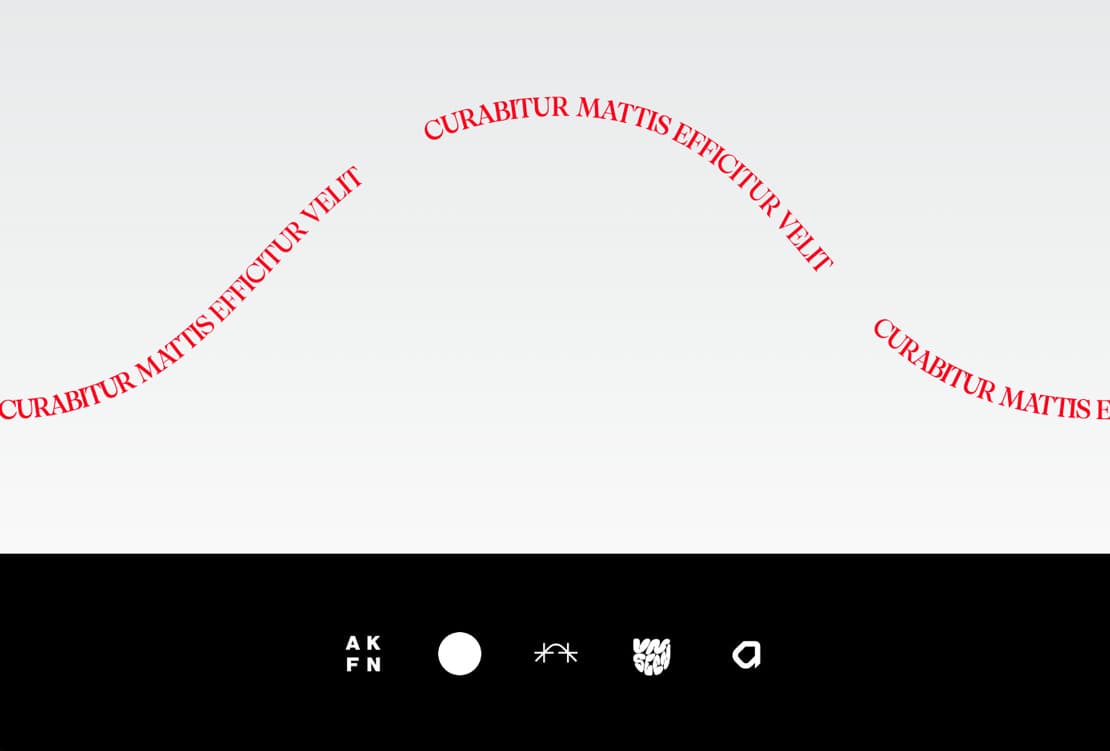
We should have something like this:
Adding an SVG Path
- The SVG can be made in any Vector based tool like Illustrator or Figma.
3
<svg className="w-full mb-40" viewBox="0 0 250 90">
4
<path fill="none" stroke="black" d="m0,88.5c61.37,0,61.5-68,126.5-68,58,0,51,68,123,68"/>
6
<Logos scrollProgress={scrollYProgress}/>
Adding Text Along it
3
<svg className="w-full mb-40" viewBox="0 0 250 90">
4
<path fill="none" id="curve" d="m0,88.5c61.37,0,61.5-68,126.5-68,58,0,51,68,123,68"/>
5
<text className="text-[6px] uppercase" style={{fill: "red"}}>
7
[...Array(3)].map((_, i) => {
8
return <textPath key={i} startOffset={i * 40 + "%"} href="#curve">Curabitur mattis efficitur velit</textPath>
13
<Logos scrollProgress={scrollYProgress}/>
- To stick the
textPath to the path, all you have to do is add an href and an id to them.
We should have something like this:
Moving the Text on Scroll
Next up we're going to move the text along the path on scroll. To do that all we have to do is use the previously created scrollYProgress.
We also have to add refs to each textPath, in order to target them and change their styling.
1
<text className="text-[6px] uppercase" style={{fill: "red"}}>
3
[...Array(3)].map((_, i) => {
4
return <textPath key={i} ref={ref => paths.current[i] = ref} startOffset={i * 40 + "%"} href="#curve">Curabitur mattis efficitur velit</textPath>
Animating on scroll
To animate on scroll, there are multiple ways of doing it, but for now, we can simply listen to the scroll event and adjust the offset.
2
scrollYProgress.on("change", e => {
3
paths.current.forEach( (path, i) => {
4
path.setAttribute("startOffset", -40 + (i * 40) + (e * 40) + "%");
Finally we can add a smooth scroll to make everything a bit cleaner.
2
const lenis = new Lenis()
6
requestAnimationFrame(raf)
9
requestAnimationFrame(raf)
We should have something like this:
Wrapping up
That's it for this tutorial!
It's actually super easy to move a text along a path and the result is super nice too! Hope you learned something!
-Oli

